Crafting Memories: The Ultimate Guide to the 3D Camera Shaped Photo Box Laser Cut CNC Design
In the realm of personalized gifts and creative laser cutting projects, few designs capture the imagination quite like a 3D Camera Shaped Photo Box Laser Cut CNC file. This intricate digital template allows makers to transform flat sheets of wood, acrylic, or cardboard into a stunning, three-dimensional replica of a vintage camera that serves a dual purpose: it is both a decorative piece of art and a functional storage solution for cherished photographs. For hobbyists and professional crafters alike, understanding the nuances of this design can elevate your portfolio and provide a unique gift option that stands out in a crowded market.
The Appeal of Layered Depth and Nostalgia
The primary allure of the Camera Shaped Box Gift Idea lies in its aesthetic complexity. Unlike simple two-dimensional cutouts, this design utilizes multiple layers to create depth, shadow, and perspective. When assembled, the box mimics the mechanical details of a classic film camera, complete with lens rings, viewfinders, and body contours. This layered approach not only enhances the visual appeal but also adds structural integrity to the final product.
Nostalgia plays a significant role in the popularity of this item. In an era dominated by digital snapshots and cloud storage, there is a growing movement toward tangible memories. A Decorative Camera Box acts as a physical vessel for these memories, encouraging users to print out their favorite digital photos and store them in a meaningful way. It bridges the gap between modern technology and traditional craftsmanship, making it an ideal project for those who appreciate the tactile nature of handmade goods.
Technical Precision: Understanding the File Formats
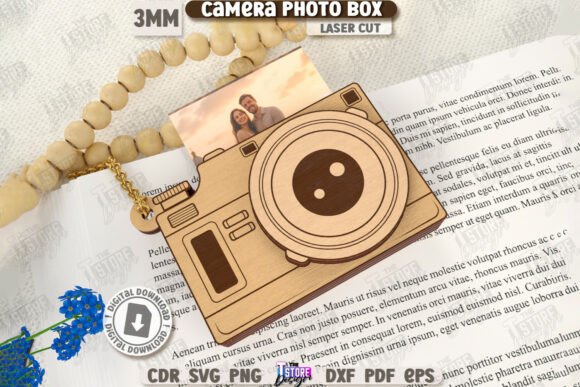
To successfully bring this design to life, one must start with high-quality digital assets. The provided digital product typically includes a comprehensive zip archive containing five essential file formats: SVG, EPS, PNG, PDF, and DXF. Each format serves a specific purpose in the workflow of different software ecosystems.
- SVG (Scalable Vector Graphics): Ideal for web-based design tools and some entry-level laser software. However, users should be cautious as scaling issues can occur.
- DXF (Drawing Exchange Format): This is often the preferred format for professional CNC and laser cutting software due to its precision and compatibility with industrial standards.
- EPS (Encapsulated PostScript): Useful for graphic designers who may want to modify the artwork in vector editing programs before sending it to the cutter.
- PDF: Great for viewing the design, printing instructions, or using with plotters.
- PNG: A raster image useful for previewing the design or creating marketing materials, though not suitable for cutting paths.
A critical technical consideration involves the software used to operate the laser cutter. Many users rely on Lightburn, a popular interface for laser machines. It is important to note that Lightburn will sometimes distort the dimension of the files, especially when SVG file formats are used. To avoid misaligned layers or incorrectly sized components, it is highly suggested to use the DXF file format instead. DXF files maintain strict dimensional accuracy, ensuring that each layer of your Layered Photo Camera fits together perfectly without gaps or overlaps.
Material Selection and Machine Compatibility
This product is great for Laser Cutting Machines, but the choice of material significantly impacts the final outcome. Wood veneers, such as birch plywood, are the most common choice due to their ease of cutting, natural beauty, and affordability. The contrast between the laser-engraved edges and the smooth surface of the wood highlights the intricate details of the camera design. Alternatively, acrylic can be used for a more modern, sleek look, though it requires different power and speed settings to achieve clean cuts without melting.
Before beginning the cut, ensure your machine is calibrated. The design relies on precise interlocking tabs and slots. If the kerf (the width of the material removed by the laser) is not accounted for, the pieces may fit too loosely or be impossible to assemble. Most modern laser software allows for kerf compensation, which is essential for a snug fit in multi-layered projects like this Photo Storage Box.
Interpreting the Cut and Engrave Lines
One of the most user-friendly aspects of this CNC file is its clear visual coding. The design distinguishes between cutting paths and engraving areas using color-coded lines, which simplifies the setup process in your laser software.
- RED line – CUT: These vectors tell the laser to cut completely through the material. Ensure your power and speed settings are optimized for full penetration.
- BLACK line – ENGRAVE: These areas indicate where the laser should etch the surface. This is used for adding texture, shading, or decorative details to the camera body, enhancing the 3D effect without cutting through.
Properly mapping these colors in your software is crucial. Mistaking an engrave line for a cut line can result in weakened structural parts, while treating a cut line as an engrave will leave the pieces connected to the waste material. Always perform a test cut on a scrap piece of the same material to verify your settings before committing to the final project.
Assembly and Customization Tips
Assembling a Pop-Up Cards CNC File style project requires patience and precision. The 3D Camera Photo Box Laser Cut Camera Shaped Box consists of numerous small parts. It is recommended to organize the pieces by layer before starting. Use a high-quality wood glue or acrylic cement, depending on your material, to secure the joints. Applying glue sparingly is key; excess adhesive can seep out and mar the finish of the visible surfaces.
Customization is where this project truly shines. While the base design is a camera, the interior can be adapted. You might choose to add a small LED light inside the "lens" area to create a glowing effect, turning the box into a nightlight. Alternatively, you can stain the wood in different tones to highlight specific layers, creating a striking visual contrast. For those giving this as a Birthday Gift, consider engraving a personal message or date on the bottom plate of the camera, adding a sentimental touch that transforms a generic craft into a heirloom.
Practical Applications Beyond Gifting
While often marketed as a gift idea, the utility of this design extends further. Photographers and photography enthusiasts may find this box to be a charming addition to their studio decor, serving as a business card holder or a display for memory cards. Educators can use the assembly process to teach students about spatial reasoning, engineering principles, and the history of photography. Furthermore, vendors at craft fairs often find that intricate, functional items like this sell better than purely decorative ones because customers perceive higher value in objects that serve a purpose.
The versatility of the 3D Camera Shaped Photo Box Laser Cut CNC file makes it a valuable asset for any maker’s library. Whether you are creating a one-of-a-kind present for a photography lover, expanding your product line for an online store, or simply enjoying the satisfaction of building something complex from scratch, this design offers a rewarding challenge. By paying attention to file formats, material choices, and assembly techniques, you can produce a professional-quality item that celebrates the art of both photography and fabrication.
Remember, the success of the project hinges on the preparation. Take the time to review the compatibility of your cutting machine and software, select the DXF format for precision if using Lightburn, and respect the distinct red and black line instructions. With these steps in mind, you are well-equipped to create a stunning Layered Photo Camera that will be treasured for years to come.