Mastering the Shaker Christmas Ornaments 3D SVG for Professional Results
The holiday season brings a unique pressure for crafters and small business owners alike. You want your projects to stand out, yet you are often racing against tight deadlines. This is where the Shaker Christmas Ornaments 3D SVG becomes an invaluable asset. Unlike traditional flat cutouts, these designs add depth, movement, and a tactile quality that captures attention immediately. However, simply downloading a file is not enough to guarantee a polished final product. Many creators stumble not because they lack talent, but because they overlook critical technical details regarding file compatibility, layer management, and material selection.
Understanding the nuances of this specific digital format can save you hours of frustration and wasted materials. Whether you are a beginner using a home cutting machine or a seasoned entrepreneur fulfilling bulk orders, recognizing common pitfalls ensures your workflow remains efficient and your results remain high-quality.
Verifying Software Compatibility Before You Cut
One of the most frequent mistakes creators make is assuming universal compatibility across all cutting platforms. The description notes that this 3D SVG is effortlessly trimmable on Silhouette Studio and Cricut Design Space. This specificity matters. While SVG is a standard vector format, how different software interprets layers, offsets, and cut lines can vary significantly.
If your creativity flows through a different type of machine, such as Brother ScanNCut or older versions of Sure Cuts A Lot, you must ascertain its compatibility with this distinct file format before purchasing or beginning your project. Some software struggles with the complex nested layers required for shaker effects. If the software cannot properly separate the "window" layer from the "frame" layer, you will spend excessive time manually adjusting paths. This inefficiency kills profitability for small business owners and dampens the joy for hobbyists.
Better Approach: Always open the file in your specific software immediately after download. Check if the layers are grouped correctly and if the cut lines are recognized as distinct paths. If you use non-standard software, look for a test cut option to verify precision before committing expensive cardstock or acetate.
The Hidden Complexity of Layer Management
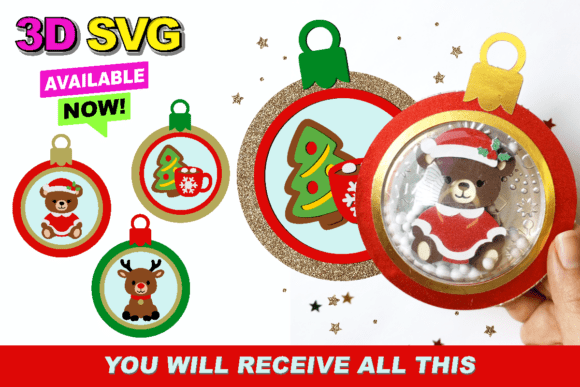
A shaker ornament relies on the precise interaction between multiple layers: the front frame, the transparent window, the loose fillings, and the back panel. A common misunderstanding is treating the Shaker Christmas Ornaments 3D SVG as a single image rather than a construction kit. Beginners often fail to ungroup elements properly, leading to cuts that do not align or windows that are too small to hold the shaker elements.
When layers are misaligned by even a millimeter, the adhesive tape used to create the shaker pocket may be visible, ruining the clean aesthetic. Furthermore, if the internal cavity is too shallow due to incorrect layer stacking, the sequins or beads will not move freely, resulting in a dull, static appearance instead of the desired dynamic sparkle.
- Check Layer Order: Ensure your software displays the layers in the correct stacking order from bottom to top.
- Verify Offset Settings: Some designs require you to create an offset for the adhesive layer. Do not assume this is pre-built unless specified.
- Test Fit: Perform a dry fit with scrap paper before cutting your final materials to ensure the cavity depth is sufficient.
Material Selection Impacts Durability and Aesthetics
Another overlooked detail is the choice of materials relative to the design’s structural integrity. A 3D SVG design implies depth, which means the ornament must withstand the tension of being filled and sealed. Using paper that is too thin for the frame can result in warping when glue is applied, while acetate that is too thick may not adhere properly to the frame edges.
Many creators opt for the cheapest available cardstock, only to find that it tears during the weeding process or fails to hold the weight of the shaker fillings. This leads to customer complaints for sellers and disappointment for gift-givers. The cost savings on materials are negligible compared to the reputation damage caused by a fragile product.
Practical Advice: Use heavy-weight cardstock (80lb or higher) for the frame to provide rigidity. For the window, opt for clear acetate sheets specifically designed for crafting, as they offer clarity without the static cling issues of some plastic wraps. Ensure your adhesive is strong enough to bond paper to plastic but dries clear to maintain visibility.
Efficiency Through Proper File Organization
The product is described as easily accessible in a neat, zipped folder. This organization is a clue to how you should manage your own digital assets. A common mistake is leaving files scattered across desktops or cloud drives without proper labeling. When you need to reproduce a best-selling design months later, searching through unorganized folders wastes valuable time.
Moreover, failing to back up your purchased files can lead to disaster if your hard drive fails. Treat your digital purchases like physical inventory. Store them in a structured directory system, perhaps categorized by holiday, complexity, or machine type. This habit ensures that when inspiration strikes or an urgent order comes in, you can locate the Shaker Christmas Ornaments 3D SVG instantly.
Avoiding the "One-Size-Fits-All" Mentality
While the SVG file provides the blueprint, it does not account for every variable in your specific setup. Blade depth, mat stickiness, and machine calibration all play roles. A mistake many professionals make is skipping the test cut when switching materials. Even if you have used the same SVG file ten times before, a new batch of cardstock may have a different texture or thickness that requires adjusted pressure settings.
Ignoring these variables leads to incomplete cuts or torn paper. For intricate shaker designs, where small tabs hold the structure together, a partial cut can mean the entire piece falls apart during assembly. This not only wastes material but also disrupts your production flow.
- Always perform a small test cut on the actual material you plan to use.
- Adjust blade depth and pressure based on the test results.
- Clean your cutting mat regularly to ensure consistent adhesion.
- Keep a log of successful settings for specific material brands to streamline future projects.
Making Informed Decisions for Better Craftsmanship
Ultimately, the value of a digital design lies in how well it integrates into your workflow. Before committing to a large batch of ornaments, evaluate the design’s complexity against your available time and skill level. If you are new to 3D paper crafts, start with a single ornament to master the assembly technique. Once you are confident in handling the layers and adhesives, scale up your production.
Remember that quality communication with your audience or customers is also part of the process. If you are selling these ornaments, be transparent about the handmade nature of the item. Small variations are part of the charm, but structural integrity is non-negotiable. By avoiding common technical mistakes and respecting the nuances of the Shaker Christmas Ornaments 3D SVG, you elevate your craft from a simple hobby to a professional endeavor. Take the time to understand your tools, respect your materials, and organize your digital resources. The result will be beautiful, durable ornaments that bring joy to recipients and satisfaction to you.